|
Online Patternmaking Classes
by Don McCunn Tracing Photos ►
Week Seven ►
Week Eight
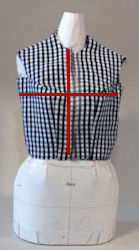
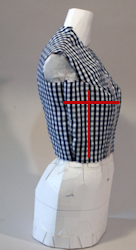
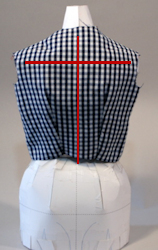
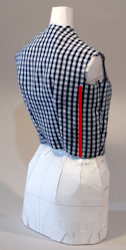
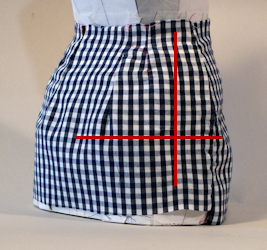
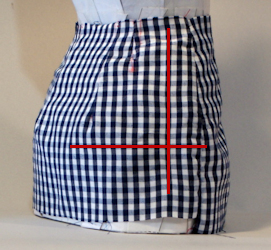
Verify the Fit with FabricWhile the instructions so far should create garments that fit well, the only way to verify complete accuracy is to make a Fitting Shell from full-scale Master Patterns. These Master Patterns are made from the quarter-scale patterns by Adding Ease and Seam Allowances and Scaling them up to full size. For these initial Fitting Shells use 1" of Ease on all four Side Seams and 1" of Seam Allowance to all seams except the Armscye and Neck Curves where 1/2" Seam Allowances should be used. ContentsPreparationThe Fitting Shell should be cut from gingham that has 1/4" gingham square woven pattern. It shows whether or not the horizontal grain of the fabric at the bust/chest and hip level are parallel to the ground and the vertical grain around the body is perpendicular to the ground. 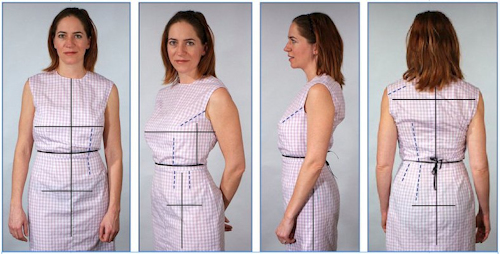 Gingham Fitting Shells allow the fitting process to be done by viewing photographs. This can be more accurate than in-person fittings because lines can be drawn on the photographs to determine where the grain of the fabric should be located. If the grain is not located correctly, the necessary adjustment to the patterns can be determined by counting the number of gingham squares required to make the change. To simplify the process if you are using Paper & Pencil, a 1/4" Scale Ruler can be used to count the number of gingham squares needed for any changes. If you are using CAPD to print and cut your patterns, set Studio Software's Grid to 1/4" to make the changes to the patterns a very quick and easy process. Caveat using Silhouette America's equipment to cut the gingham directly is not recommended. It is crucial that the lines of the patterns match exactly the gingham squares to achieve the necessary accuracy. The photographs of the gingham fittings can be viewed by zooming in to see close-ups. This can result in an accuracy of up to 1/8" which is more accurate than clothes require. By fitting from photographs the Client can take the photos so in-person fittings are not required. This is also convenient for people making clothes for themselves eliminating the need for a helping hand or twisting and turning to do a fitting while looking in a mirror. The photos should be taken from the same poses used to create the original patterns. The camera's "eye" should be at bust/chest level for the Upper Torso and at hip level for the Lower Torso This fitting process is also described on pages 214 through 216 of Fashion & Costume Design in Quarter Scale. The images below show a half-scale Mini-Me of the model Alex using gingham with 1/8" gingham squares. The Mini-Me was created using the Master Patterns from an in-person fitting. Verifying the Upper TorsoFor the Upper Torso the horizontal grain of the gingham should be parallel to the floor at the bust/chest level and the vertical grain at Center Front, Side Front, Center Back, and Side Back should be perpendicular to the floor. The photos below show that the traced photos achieved the shaping to achieve the position of these grain lines.
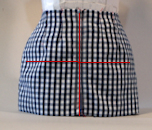
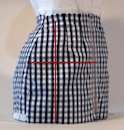
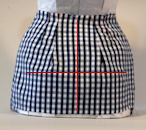
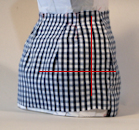
Verifying the Lower TorsoFor the Lower Torso the horizontal grain of the gingham should be parallel to the floor at the hip level and the vertical grain at Center Front, Side Front, Center Back, and Side Back should be perpendicular to the floor. The photos below show that the traced photos achieved the shaping to achieve the position of these grain lines except for the Side Back.
A close up of the Side Back shows how the vertical grain at the waist is 1-1/2 gingham squares too close to the hip dart. The Fitting Shell needs to be changed by making the dart 1-1/2 gingham squares smaller to correct the position of the vertical grain. Change the PatternWhile the changes can be made directly to the Fitting Shell by unpicking and resewing, the patterns also need to be changed. During this process the pattern can be refined further. For example the Side Back dart is close to the Hip dart. This position can be changed so the Side Back Dart is half way between the Hip dart and the Side Seam. If you are using pencil and paper to record the patterns, the changes can be made by erasing and redrawing. If you are using CAPD, the video below shows how to make the changes to the quarter-scale Lower Torso pattern. In order for Studio's Grid function to match the Gingham Squares the Grid needs to be scaled accordingly. Quarter Scale of 0.25 = 0.063" See Also in the CAPD Classes
See Also in the Patternmaking ClassesThese patternmaking classes for fitting are more comprehensive because they are for patterns that are created from measurements. No photographs were used during the initial drafting process. The videos show in-person fittings of both men and women as well as DIY fittings.
Tracing Photos ►
Week Seven ►
Week Eight
Copyright © 2026 by Donald H. McCunn
| ||||||||||||||||||||||||||||||||||||||||