|
Books & Free Online Patternmaking Classes
by Don McCunn
About These Free Pattern Making Classes
These books and classes are a result of over 50 years helping people create custom-fit clothes. It has been an interesting journey. The journey began when I was a student in a class for creating theatre costumes. I was fascinated by how to shape fabric to create different designs to portray each of the characters. This journey has resulted in a lot of discoveries and interesting experiences.
Contents
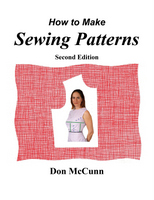
The books for these classes may be available from your library. How to Make Sewing Patterns, having been around for over 50 years, is already in many libraries. If you would like to see this trilogy available in your library, take a copy of the two page Library Flyer to your local library so they will know about this trilogy.
Bespoke vs Ready-to-Wear
When I started researching the techniques to create patterns, I encountered a lot of information about how to create patterns for the fashion industry. The patterns need to be shaped to fit as many people as possible based on standardized measurement charts with instructions you had to follow by rote.
|
To create the costumes I wanted to make as a costume designer, I needed to understand what I was doing so I could create patterns to fit any body for any design. I decided to develop my own approach. It starts by looking at the size and shape of the person you are designing for. I call them Bespoke patterns to differentiate them from Ready-to-Wear (RTW) patterns.
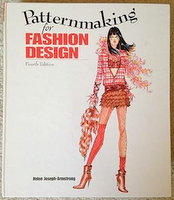
Helen Joseph-Armstrong has written a classic text for the RTW industry. You can see the difference between the RTW and Bespoke designs by looking at her cover. Her's is a very catchy fashion design. Mine focus on showing what real people look like.
|
|
 |
Pattern Design is Not Rocket Science
When I was working on developing my approach for creating a pattern design approach for costuming I had the good fortune to teach "Costume History and Design" at a local community college.
In this class I assigned each student a costume for an actor in a local community theatre group that I was designing the costumes for. Each student was responsible for the entire process from measuring and fitting the actor, creating the pattern, and sewing the final costume. At least half the class were students who had never sat down at a sewing machine before.
|
|
When the class was winding up I learned one of the students who had created a costume had never learned to wind a bobbin. You only need black and white thread for costumes. Any time the machine ran out of bobbin thread, he went to a different machine. I was so amused I gave him an "empty bobbin" award.
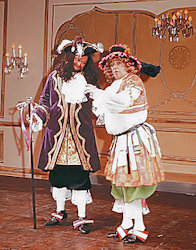
In this production of Moliere's "The Would-Be Gentleman" the actor playing the lead had a slight frame which was not appropriate for the character he was playing. I made a padded jumpsuit for the historically accurate, ridiculous costume he wore. After opening night he told me his friends complained because they came to see him and he never appeared. He had been on stage almost the whole time.
|
|
The Search for a Publisher
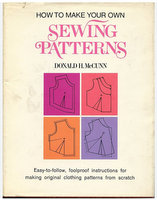
It took awhile to develop, research, and test my instructions. After I finished my graduate degree I looked for a New York publisher to turn my idea into a reality. It was with great good luck that Harold Hart told me he would publish my book if I would change the book showing the general public how to make patterns rather than just costumers.
So I rewrote the book. In his wisdom Mr Hart did not trust the instructions I had written. He gave one of his editors a full year to try out the book making every garment I was showing people how to create. At the end of the year her only comment was "You should number your instructions instead of presenting them as block paragraphs." I have cherished that advice ever since.
|
|
 |
Visual vs Book Learning
After moving to San Francisco I went with book in hand to the administration of the Adult Education division of the Community College and asked if they would like to offer a class on pattern design. They said yes. My initial class was so popular I found myself teaching hundreds of students in four sessions each semester at two different locations.
What surprised me was how quickly the students could learn how to design patterns if they saw a demonstration instead of just reading the instructions in the book.
At the time the only way to make demonstrations available to a wider audience was to record the classes on celuloid film. The person interested in learning would then need to buy the film, a film projector, and a portable screen. I realized it was an impractical a solution. I never pursued it.
The internet with streaming videos has changed that issue. I now have over 600 short, topic focused videos covering a wide range of pattern design techniques. The videos are short because when I started creating them people downloaded the video over a dial-up phone connection. Using this technology downloading a 5 minute video could take several hours.
I now keep them as short as possible so people can quickly go to the information they want without having to watch half an hour or more of what they do not need to know.
|
Gingham vs Muslin Fitting Shells
When I started teaching at SFCC I did what most instructors do which is to test out the patterns in muslin fitting shells.
To verify my students were getting the correct fit I would take a magnifying glass to class to make sure the grain of the fitting shell was in the correct location.
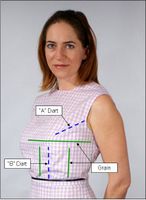
Then one day I was in a fabric store and my eyes fell on gingham. Every since then, in the early 70s, I have always recommended to my students to use gingham for fitting shells. I no longer needed to rely on a magnifying glass. As it turns out gingham is excellent for evaluating fit from photographs. I find it easier to examine photos enlarging as necessary than it is to do an in-person fittting.
|
|
|
Body Doubles as Dress Forms
One of the first questions my students asked me is "How can I get a dress form that I can use for fitting?" I knew the custom-fit patterns we were creating were changing the three-dimensional shape of the body into two-dimensional patterns. Why not cut these patterns out of stiff paper like artist's mat board and tape the shapes back together.
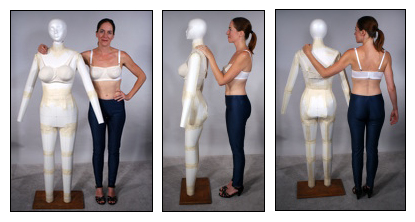
For women I recommended reducing the form to the size of their rib cage and reconstructing the bust by stuffing an old bra. At the end of the semester my students would walk out the door with their body doubles tucked under their arms.
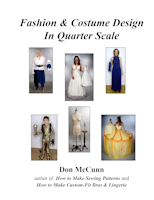
Since those early classes I have developed instructions for adding legs and bra forms which I describe in my Body Double class. The Bra Forms are also described in my Fashion & Costume Design in Quarter Scale on pages 189 to 191.
Quarter-Scale Prototyping
 |
|
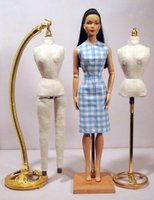
In 2006 I took a class from Dr. Bill Jones, a retired professor of design at San Francisco State University, on working with fashion dolls. I had always avoided doing RTW because I knew how much bodies could vary. But these fashion dolls were made in the thousands with very strict standards for maintaining exact body shapes.
I was intrigued by the idea of exploring pattern design on these quarter-scale mannequins so I started developing patterns to sell. Of course I had to start with a gingham fitting shell so other fashion doll enthusiasts could create their own designs. And of course I was well versed in the importance of having Body Doubles for these dolls.
|
Fit First Then Design
I have been aware of the issues people have encountered working with commercial patterns. I encountered it first hand when I started exploring pattern design in the 70s. I made garments from three commercial patterns. Only one became a wearable garment.
The problem is commercial patterns have to lump fit and design into a pattern. For Bespoke patterns you start with fit. Once you have established fit you can apply designs to those patterns.
|
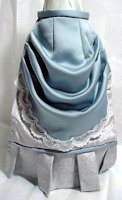
When I started to teach online one of the first classes I wanted to offer was An Introduction to Pattern Design. I wanted to skip over the fitting issue and jump right into design. To do this I needed the same body shape for everyone to work from. Fashion Dolls at over $100 a piece were not appropriate. After some research I discovered there are very strict standards for the shape of wine bottles everywhere in the world. So that is what I used so the students could create an original design for an apron.
In my 2008 Contest I offered one student free access to any one of my other classes at no charge when their entry was selected best by their fellow students. I had 25 entries. The one you see really impressed me. I still haven't figured out how she did it. If you are interested, these classes are still available.
|
|
|
To continue showing people how easy pattern design is I use this same bottle concept for my Pattern Design Activites for Kids. These classes are for anyone over 5 who wants to learn pattern design even before they know how to sew. I did include a pattern for making a wine bottle shape out of cardboard and sewing instructions in Week Four.
"How Do You Make a Pattern For a Bra?"
One of the first question I was asked in my SFCC classes was "How do you make a pattern for a bra?" At the time the necessary bra making notions such as underwires were not readily available. I did not pursue the issue.
With the advent of the internet forums I was once again asked that question. Bra making notions were now available so I started a group for women who were specifically interested in knowing how to make bras.
 |
|
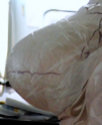
The problem with creating a bra pattern is how to support the breast tissue to create the pattern. I had come up with a very complicated system which does not deserve describing. Fortunately one of the women in the group came up with the idea of creating a mold of the breast using Press'n Seal. She shared this photo of how she had done it. It is an excellent solution for supporting and capturing all the complex contours of the breast regardless of size. I expanded on the idea of how to use this technique to create a complete pattern for a conventional underwire bra.
|
I ended up developing instructions for creating five different types of bras for my How to Make Custom-Fit Bras & Lingerie: Bikini, Bandeau, Underwire, Athletic, and my own original Bust Sling design. Any of these bras can be used with a skirt to create lingerie and dresses with an Empire waistline garment.
Bust Sling Bras
|
The Bust Sling Bra was my solution for women who had large cup sizes. After some research I discovered the thin straps of underwire bras passes over the Brachial Plexus nerves. Excess weight on these nerves can cause numbness, stinging pain, muscle weakness, lack of motor control, and even paralyzed arms. I also noticed that the engineering of underwire bras is cantilevered. This stucture requires a very firm support around the rib cage using a tight bra band.
The Bust Sling Bra uses a suspension structure as opposed to the cantilever. The suspension structure is the one used for back packs. As larger breasts can weigh between 6 to 8 pounds this is an important consideration. |
|
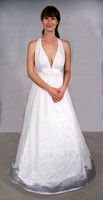 |
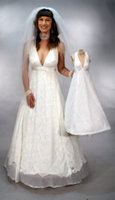
As I was developing this design some women said they did not like the look and would not wear this style. To show it is a design that can be made into attractive dresses, I include two wedding dresses among others in my book which use the Bust Sling Bra design.
Corset Patterns & Construction
Part of the reason I got involved with pattern design is I was fascinated by how historic patterns for corsets would reshape the body. When I discovered the Press'n Seal approach to creating Bra patterns, I decided to apply it to corsets. The result are my classes How to Make Custom-Fit corsets. There is no accompanying book. The text is provided as PDF files as a part of the classes.
These classes describe how to make three styles of corsets: Underbust, Strapless, and Shoulder Strap. But corsets require special notions and construction techniques. Unlike my other classes which focus on making patterns, these classes include instructions for how to make the corsets.
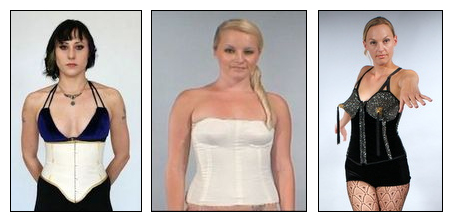
When one of my models wanted a special costume for her birthday party I could not resist doing a knock off of Jean Paul Gaultier's bullet bra corset he made for Madonna's "Blond Ambition" tour.
The DNA of Body Shapes
I have had students who wanted to make ready-to-wear garments they could sell. I have always warned them "Just because a garment fits you does not mean it will fit anyone else."
I experienced this early in my teaching career af SFCC in the 70s. One of my students had a twin sister and they shared a common wardrobe of RTW clothes including shoes. This student made her sister a simple medieval style wedding dress. She wanted to see what she would look like in it. She was very surprised to find she could not even get into it.
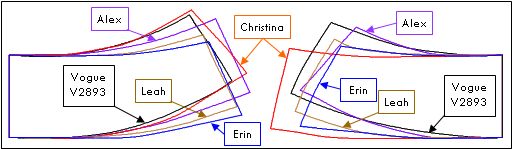
One of the examples I like to use to illustrate this issue is the beautiful pencil skirt that Donna Karan designed for Vogue Patterns (V2893). It includes a three inch contoured waistband. This portion of women's bodies varies considerably. I made contoured waistband patterns for four of my models and you can see how the shapes vary.
In Fashion & Costume Design in Quarter Scale the first section of the book compares the differences in pattern shapes of thirteen models I have worked with to a commercial dress form and Vogue's 14-C Fitting Shell. They are all in the same size range. There are no duplicates in a single pattern shape of the thirteen fitting issues described. I am now referring to the differences in fitted patterns to the DNA of Body Shapes.
Mini-Me Dress Forms
|
When I worked with Fashion Dolls I realized how useful it could be to have scaled down dress forms to try out ideas for designs including fabric choices, sewing techniques, etc. Having developed Body Doubles I realized they could be made from poster board to create quarter-scale, half-scale, or third-scale dress forms I call Mini-Mes.
When I was developing the wedding dress for How to Make Custom-Fit Bras & Lingerie I used a third-scale Mini-Me of my model Olga to work out the shape of the hoop skirt as well as the look of the dress.
In Fashion & Costume Design in Quarter Scale I include the patterns for the shape of the 13 models I had worked with as well as the commericial dress form and the Vogue fitting shell that are all in the same size range so they could be turned into Mini-Mes.
|
|
 |
The goal of these Mini-Mes is so that people interested in creating RTW garments could test their designs on the 15 "Fitting Models" to see how well a given design would work on different bodies.
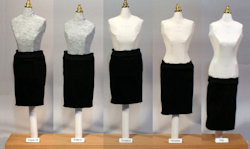
The skirt Donna Karen did for Vogue did not do very well on this test as the only body the skirt worked well on was the Mini-Me made from the Vogue Fitting Shell pattern. There is a class Making a Mini-Me that shows how quickly and easily these Mini-Mes can be made.
Pattern Design by Tracing Photos
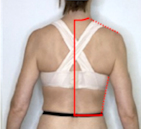
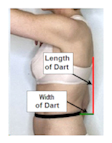
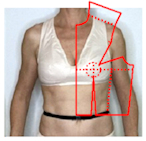
Fashion & Costume Design in Quarter Scale introduces a new approach for designing patterns by tracing quarter-scale photographs. The underlying concept for this new approach to making patterns is that measurements show how much fabric is required to cover a body but do not reveal the body's contours. Photographs show the contours of a body but not how much fabric is needed. By combining measurements and photographs, accurate Bespoke Master Patterns (aka Slopers) can be created in quarter scale then sized up to create patterns for full size garments that will require little if any fitting.
 |
 |
 |
|
 |
| 1. Trace Seams |
2. Measure Darts |
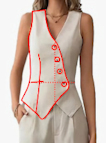
3. Use Measurements |
|
Tracing a Design |
Because the design is created from photographs and the fitting of the full-size Master Pattern can be achieved from photos of Gingham Fitting Shells, Independent Designers can create Bespoke patterns for their clients with no in-person sessions.
Designs can also be created by tracing an existing full-front catalog photograph and grading it to match the size of the Master Pattern.
Computer Aided Pattern Design
Working in quarter scale now makes it possible for any person interested in pattern design to have access to the technology that the fashion industry has been using since the 1970s called Compter Aided Design/Computer Aided Manufacturing (CAD/CAM). Instead of requiring a massive factory floor with very expensive machinery, it can be done on a desktop.
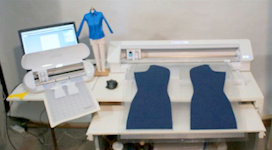
For 20 years I have been using CAD for the line drawings of patterns in my books. But I have avoided using pattern design software to create patterns. I strongly believe that it is important for a designer to be able to maintain control of their work. The problem with the pattern design software I am aware of is that it wants to do the work the designer should be doing. This means the designer is losing control of their work.
As I was finishing Fashion & Costume Design in Quarter Scale I was introduced to the print-and-cut technology created by Silhouette America. This equipment can both print and cut patterns and cut fabric.
What you see above is one of my first experiments using the equipment. I was working on developing a RTW pattern for Lindsey as I describe in the next sesction. I did an initial test in quarter scale so I could check the fit on my Mini-Mes. Once I was satisfied with the fit, I clicked a button to enlarge the patterns by 400% and had the Cameo Pro cut the fabric. Unbelievable!
The equipment is controlled by a graphics program called Studio. While it is designed for graphics it has all the CAD functions required to create patterns as I describe in my Computer Aided Pattern Design classes. It does not do pattern design for you. It gives you the tools you need to design your own patterns. This software has a very intuitive appoach to design with features such as an eraser for getting rid of unwanted lines. A function I have not seen in other CAD programs.
A Plunge Into Ready-to-Wear
I have avoided RTW patterns because I know how much body shapes can vary. But Lindsey Watson contacted me and asked for my help creating RTW patterns she could use for her High Quality Horse Show Apparel such as the one shown below.
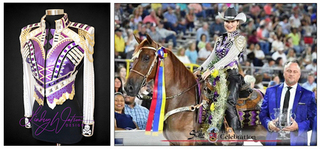
They are one-of-a-kind wearable art shirts because of the embellishments she applies to the shirts. These embellishments can take a month or more to create. Given that the women are paying several thousand dollars for a single shirt, the RTW shirts need to appear as close to custom-fit as possible.
Given the issues Lindsey faces for creating these garments I decided the time had come for me to figure out how to create RTW patterns based on Lindsey's specific requirements. I describe this journey in my CAPD classes RTW for Independent Designers in the hopes that other Independent Designers could benefit from my discoveries.
Dedication
If you have read any of this and/or made it through all of this, thank you for your interest. Please keep in mind that this is 50 years of work reduced to fit into a single web page.
Through all these years I could not have put together this information without the inquisitive and unrelenting drive of my students and the people who I have communicated with through internet forums and groups. I really feel I have learned far more from others than I have been able to pass on to anyone.
Thank you very much for being here and motivated to explore the creative field of pattern design.
Copyright © 2026 by Donald H. McCunn |